Make Ubuntu Look Like MacOS. This Guide is going to help make Ubuntu Desktop Look like MacOS Ventura. This is step-by-step customization of the gnome desktop. You can use this guide to turn any Gnome Distro look Like MacOS Ventura. For the sake of demonstration, I will be using Ubuntu 22.10. It will also work on Ubuntu 22.04. Now without further ado Let’s get started.
Update the System
First things first, go ahead open the terminal and update the package list by running this command
sudo apt updateMake Backup
Once it’s done, go ahead and install time shift by running the below command. Timeshift is a backup tool that allows capturing the snapshot of the system. This way after installing the macOS theme, if anything goes wrong this backup will help to revert to the Ubuntu desktop.
sudo apt install timeshift -yInstall Gnome Tweaks, Git & Extensions Manager
Once it’s done, execute the below commands One after the other which installs the gnome-shell extension manager, gnome tweaks, and the git command.
sudo apt install gnome-shell-extension-manager -ysudo apt install gnome-tweaks -ysudo apt install gitSetup MacOS theme
Now, Open your Favourite browser Head over to the github, and copy the below URL.

Then Open terminal, type the below command to clone the repository.
git clone https://github.com/vinceliuice/WhiteSur-gtk-theme.gitThen CD into the downloaded directory. Inside here you will see a script file. Look for the installer script and run it.
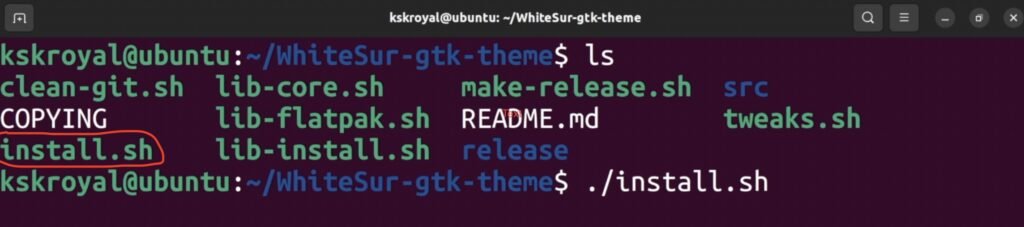
Note: The developer of this script offer options and helps to install multiple flavors of macOS themes.
I am gonna run the script file with options -m for Monetery style, -t all will install all accent colors of a theme, the -l option adds support for libadwaita, the -N option with an argument stable makes the nautilus file manager look classic, and lastly use these two options to make GTK apps look better & rounded.

Then execute this script to start installing all the things we need. Once it’s done, it’s time to run the tweaks script as a root. With in the same folder you will see tweaks.sh file execute that script with -g option to theme the Gnome display manager.

That’s it, now we are done installing themes and accent colors.
Install macOS Icon Pack
Back to the web browser, go to this link, and download the macOS Ventura Icon pack. Once it’s done, double-click on the file. Choose the home directory, then press ctrl + h to see the hidden folders. Now, create a directory named as .icons
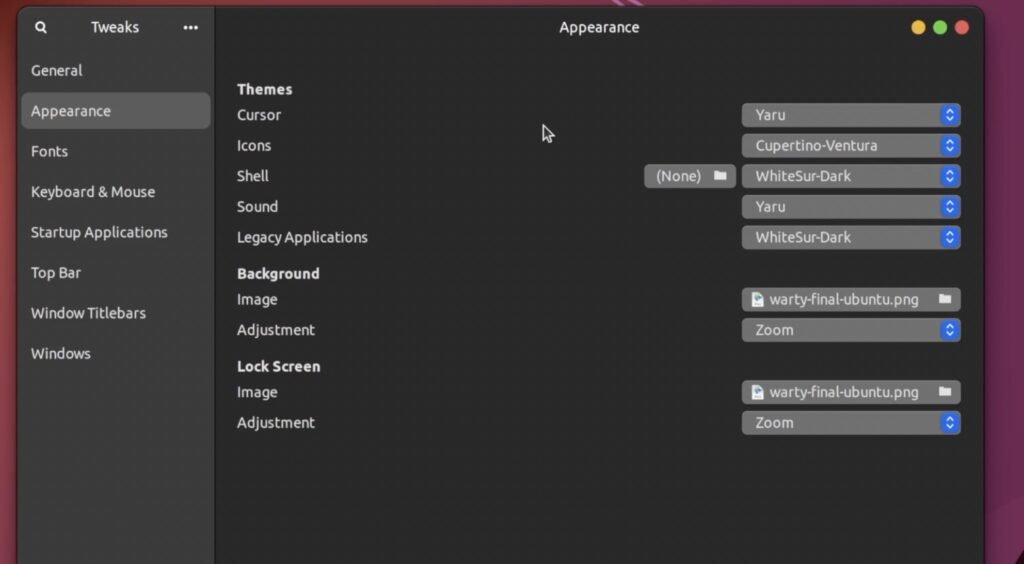
Now, head over to the app drawer and search for tweaks and open it. Here choose, appearance. Then, change the icons to Cupertino Ventura. Then select the shell, and choose the WhiteSur dark with any accent color you fancy. For now I will use the default dark theme.
Lastly, choose applications, and set the theme the same as the shell.
Voila now, you may see the entire gnome-desktop look like macOS. It’s not yet done, we need to polish the UI to make it much better.
Polishing the UI
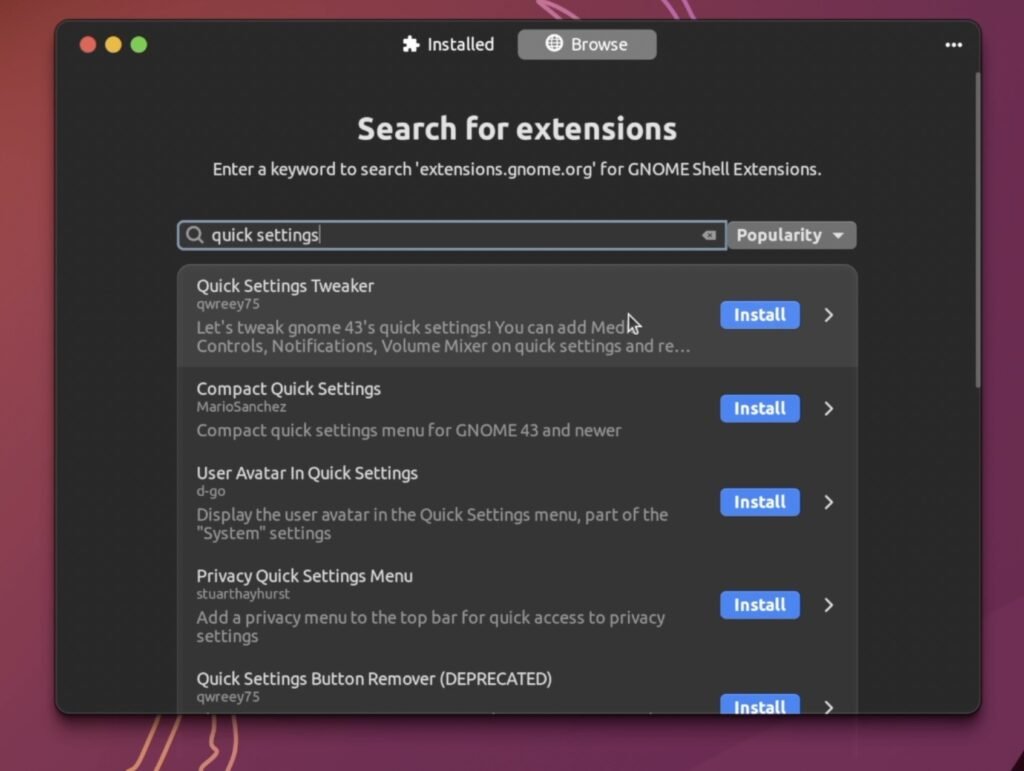
For that, I am gonna install a few extensions. Open Gnome Extensions Manager. Then Click on Browse, Using the search bar, type blur and choose Blur My Shell and install it. This will blur the Gnome shell. Once it’s done, I am gonna install another extension called Quick Settings tweaker. This helps to add more toggles to the Quick Settings Panel. Lastly, Go ahead and install Compiz Magic Lamp Effect which will give a Genie effect to the window manager whenever you minimize or maximize.
Then, open the settings manager, choose ubuntu desktop and change the position of the dock to the bottom. Also, it’s better to disable the panel mode.
Download macOS Wallpaper
Lastly, head over to this link and download the macOS Ventura wallpaper and apply it. That’s it, this is how you customize Ubuntu 21.10 or 22.04 to look like MacOS Ventura.
Removing Theme
If in case you decide to remove the macOS theme, run the installer script with the -r -u options. This will delete all the installed themes. Then run the tweaks script with the -r option to remove the GDM theme.
./install.sh -r -u./tweaks.sh -rThen use the Tweaks app and change to the YARU theme.
Now, reboot the Ubuntu system. This is one method of removing the macOS theme, but it’s not going to work very well. So, it’s better to use the time shift backup and restore the ubuntu to its original state.