Enable Hyper V In Windows 11. Hyper-V is Microsoft’s hardware virtualization product. It lets you create a virtual machines. Each Virtual Machine acts like a complete computer, running an operating system and programs.
Using Hyper V Manager you can create virtual machines and run an operating system in an isolated environment. Anyway lets go ahead and enable Hyper V in windows 11.
Pre-requisites
- A Computer Running Windows 11 (21H2, 22H2 )
- An Internet Connection
- Hardware Virtualisation Support
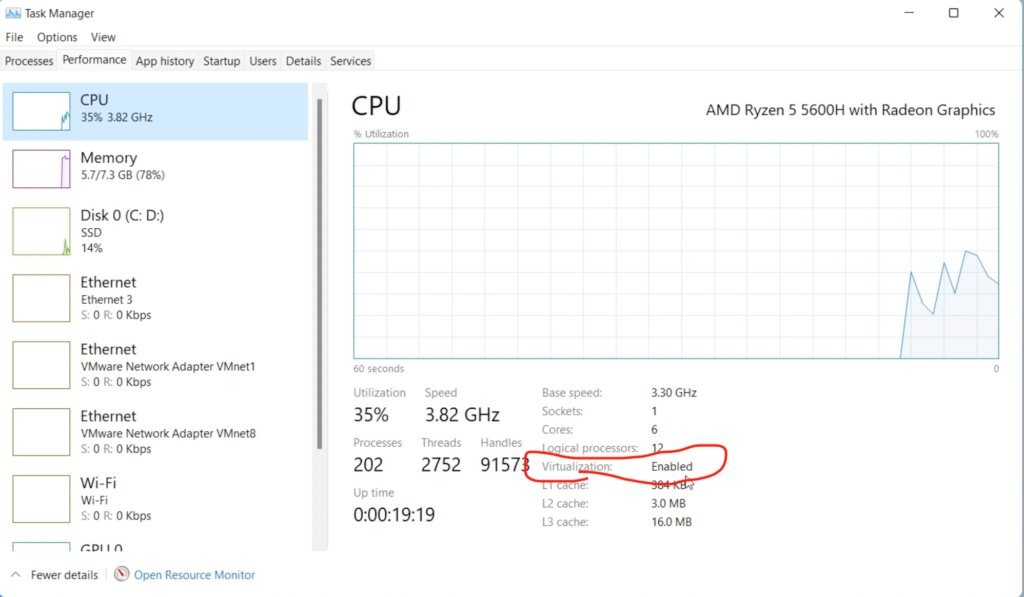
Before enabling, Hyper V on Windows 11 Laptop, your computer must support Virtualisation. Check BIOS settings, and enable Virtualisation Technology. Then open Task manager (Ctrl + Shift + ESC ) select CPU and you will see Virtualisation status.
Enable Hyper V
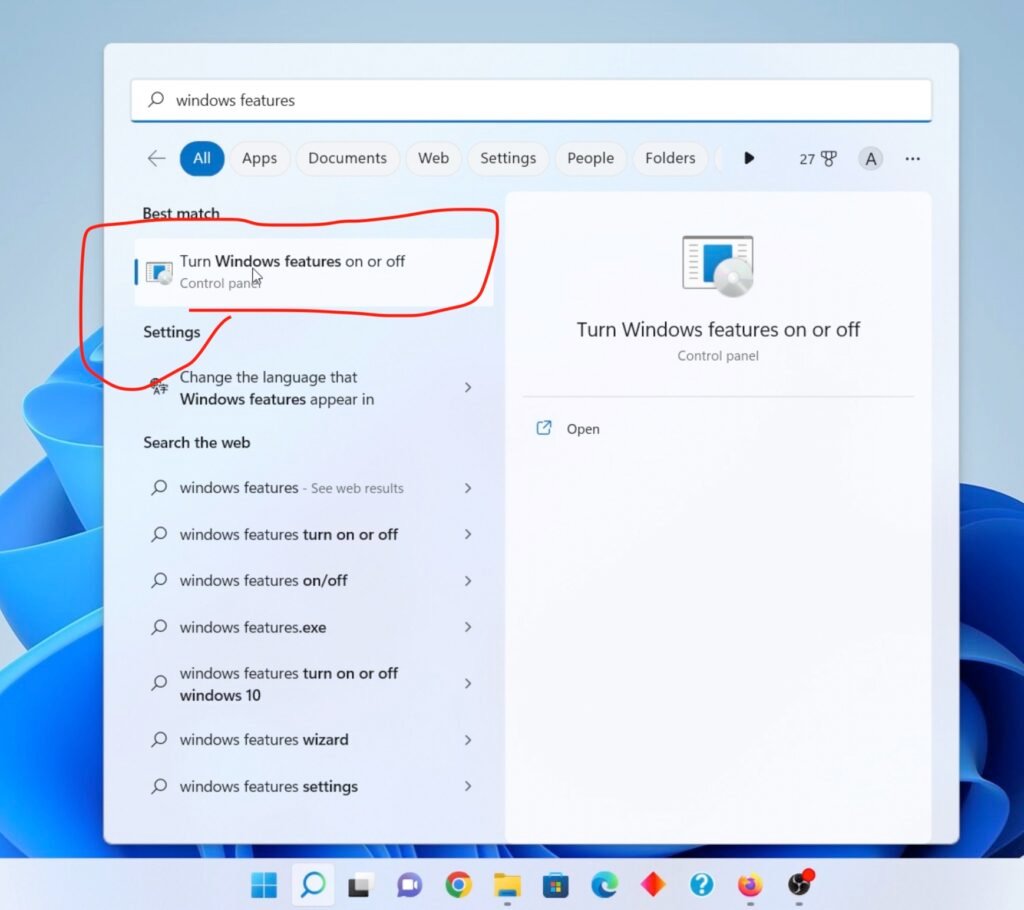
Now, Open Search Bar, and type “Windows Features“, then select “Turn Windows Features ON Or OFF“, a dialog window will appear.
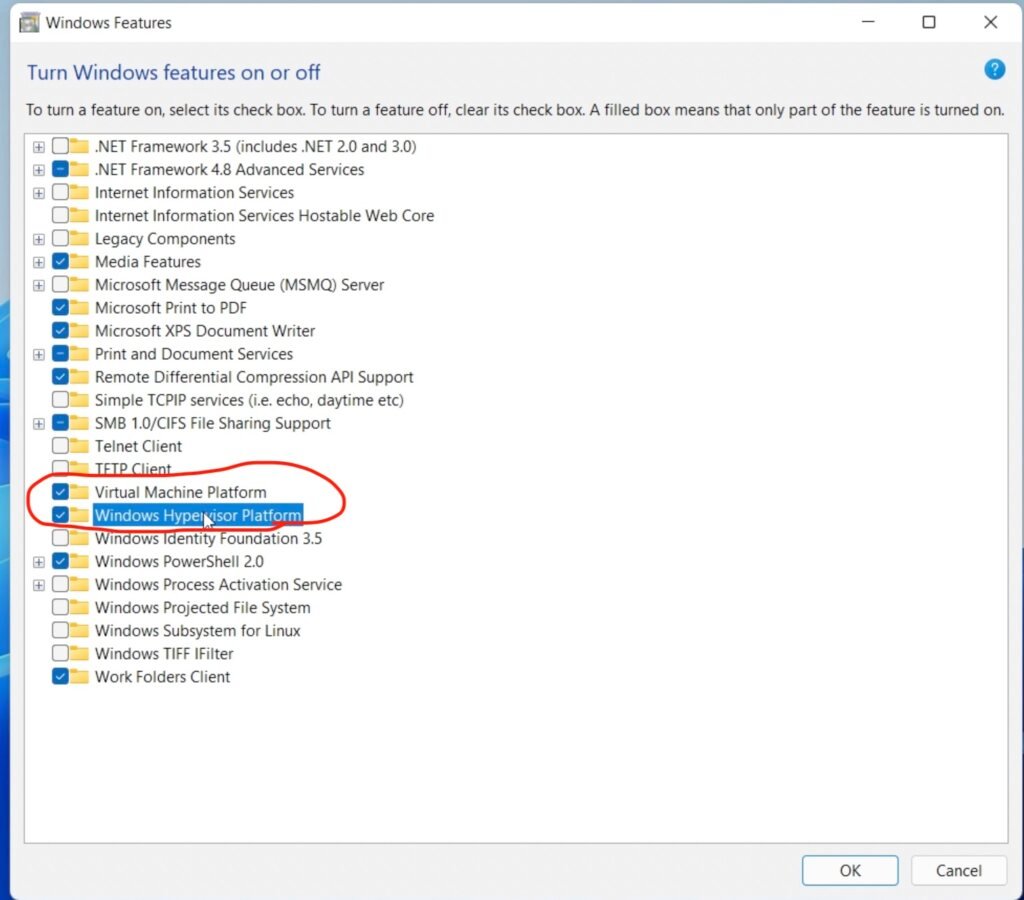
Then look for Hyper-V and enable it. If you don’t see Hyper V, look for “Virtual Machine Platform” & “Windows HyperVisor Platform“. Then Reboot the PC.
After rebooting the PC, windows 11 Pro users can see the Hyper V Manager installed.
Note: Windows 11 Home users needs to follow one more step, Follow the instructions Below.
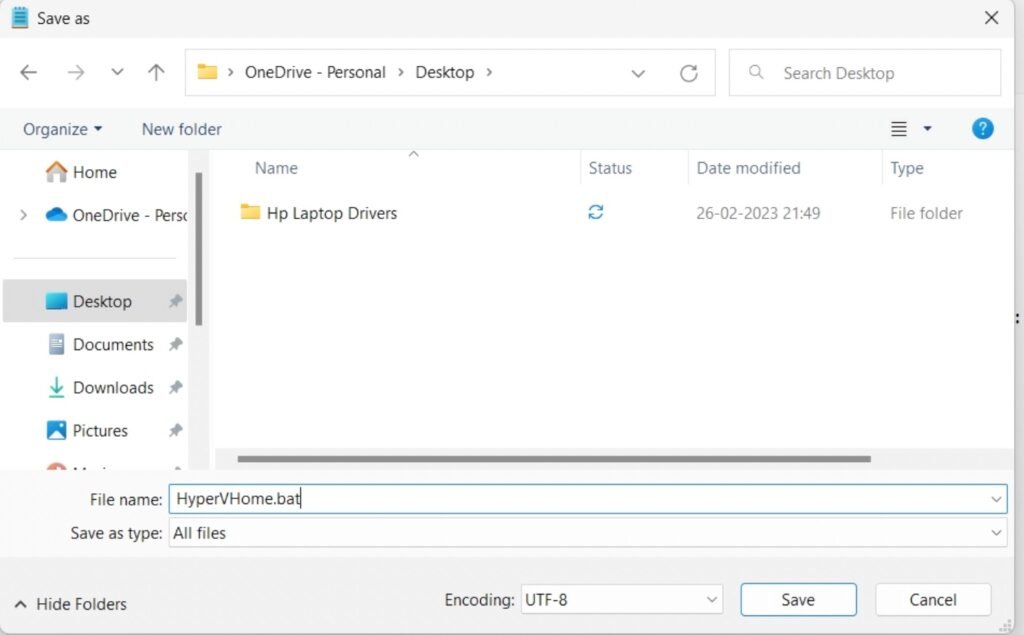
Now , open NotePad and copy the below code and paste it. Then choose File -> Save AS , and name the file with .bat extension
pushd "%~dp0"


dir /b %SystemRoot%\servicing\Packages\*Hyper-V*.mum >hyperv-home.txt


for /f %%i in ('findstr /i . hyperv-home.txt 2^>nul') do dism /online /norestart /add-package:"%SystemRoot%\servicing\Packages\%%i"


del hyperv-home.txt


Dism /online /enable-feature /featurename:Microsoft-Hyper-V -All /LimitAccess /ALL


pause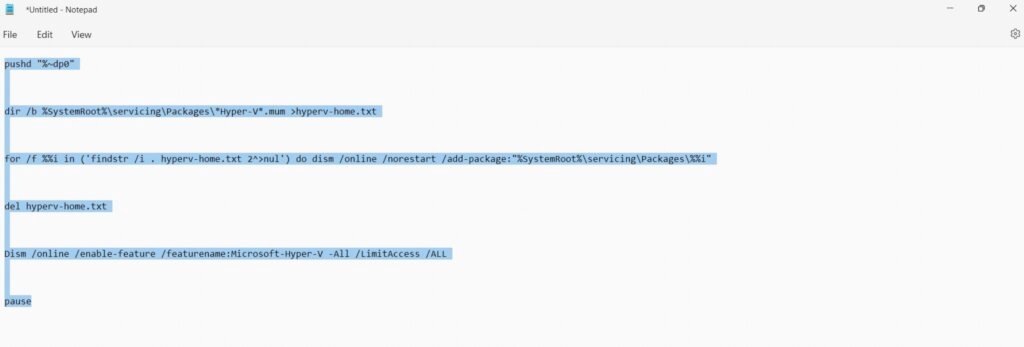
Then run the batch script , by right clicking and choose run as administrator. Wait for sometime , it will enable Hyper V Manager.
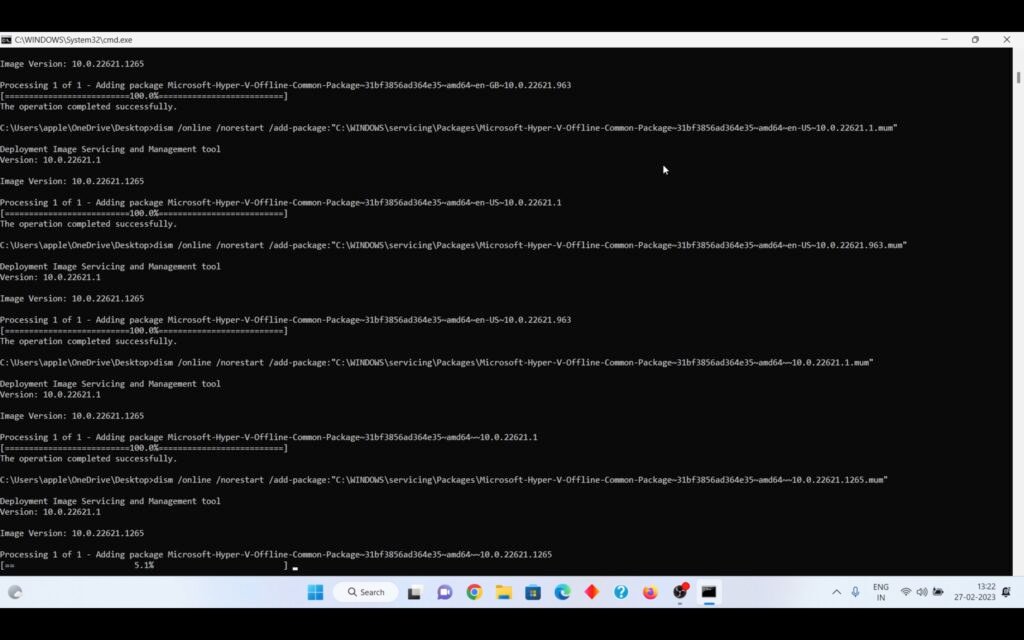
Once its done, reboot the PC. After rebooting, Open Search Bar and type Hyper V Manager.
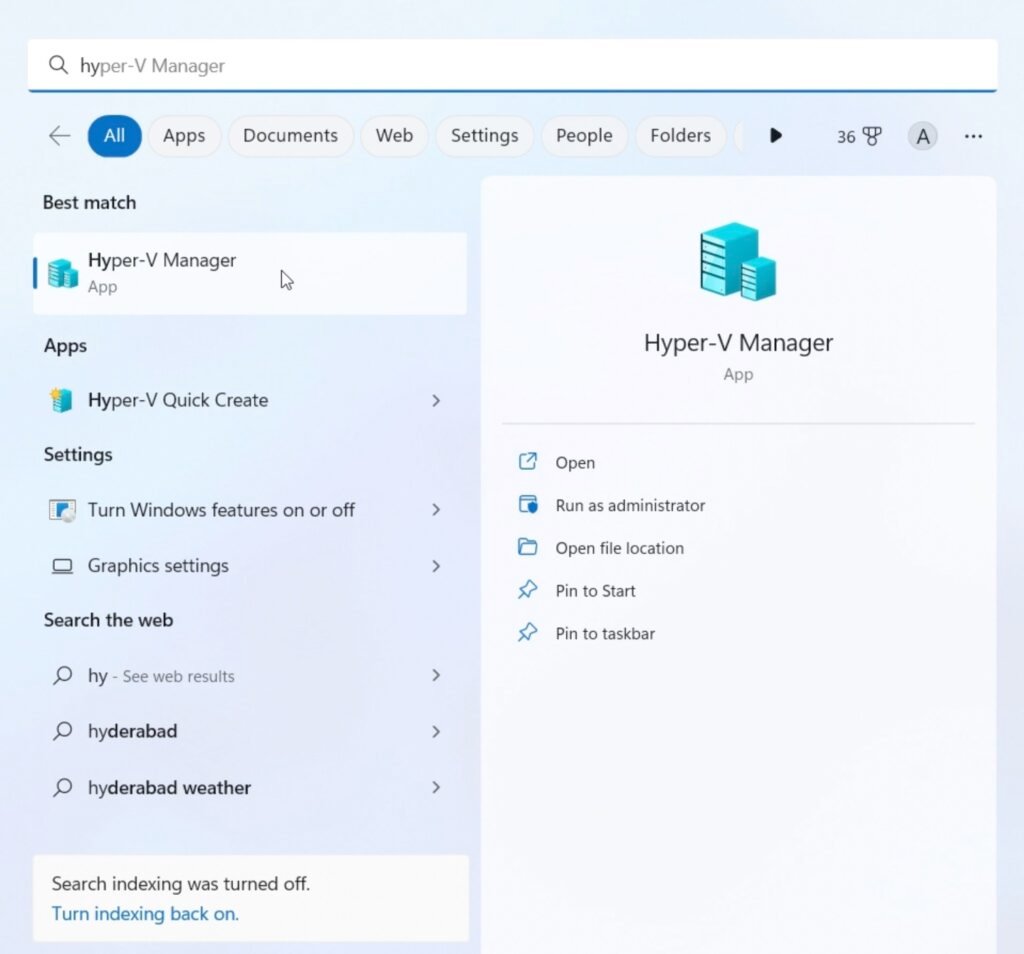
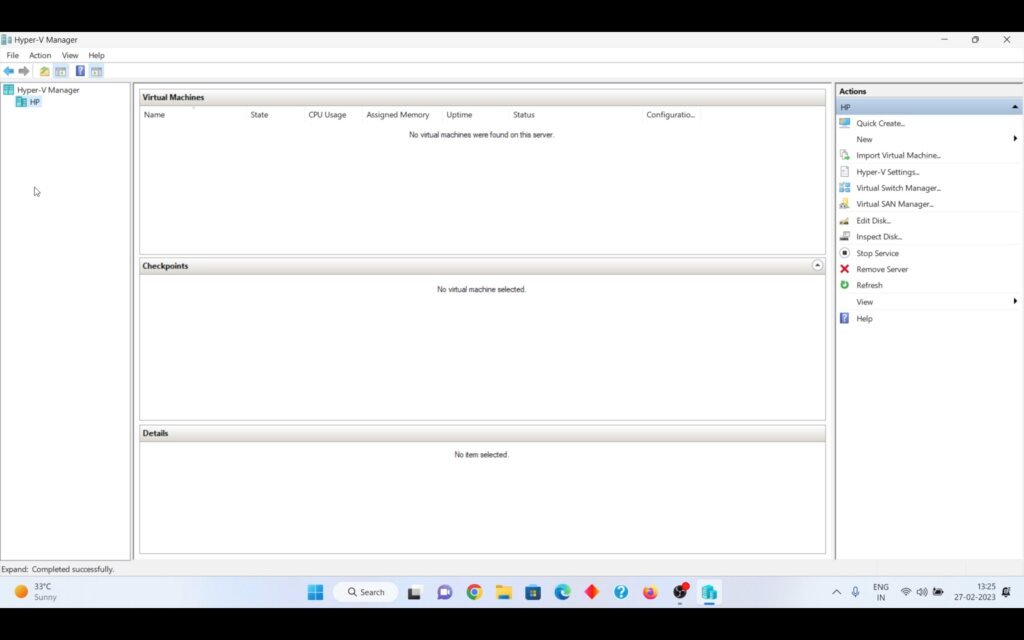
Congrats you have successfully enabled Hyper V / Hyper V Manager On your windows 11 PC.