Install Arch Linux in under 5 minutes. This is the easiest Arch Linux installation tutorial that will walk you through quickly installing and setting up your favorite desktop environment on any PC or laptop.
With that being said, it’s time to get started with the Arch Linux installation process!
Download Arch Linux And Burn it to Pendrive
First, head over to the Arch Linux website and download the ISO image. Once the download is complete, you will need to burn the ISO to a USB drive. Make sure that you have an 8GB or higher pen drive and connect it to your computer. You can use Rufus, dd, or balena etcher to create a bootable USB with Arch Linux. In my case, I will be using Rufus to burn the Arch Linux ISO.
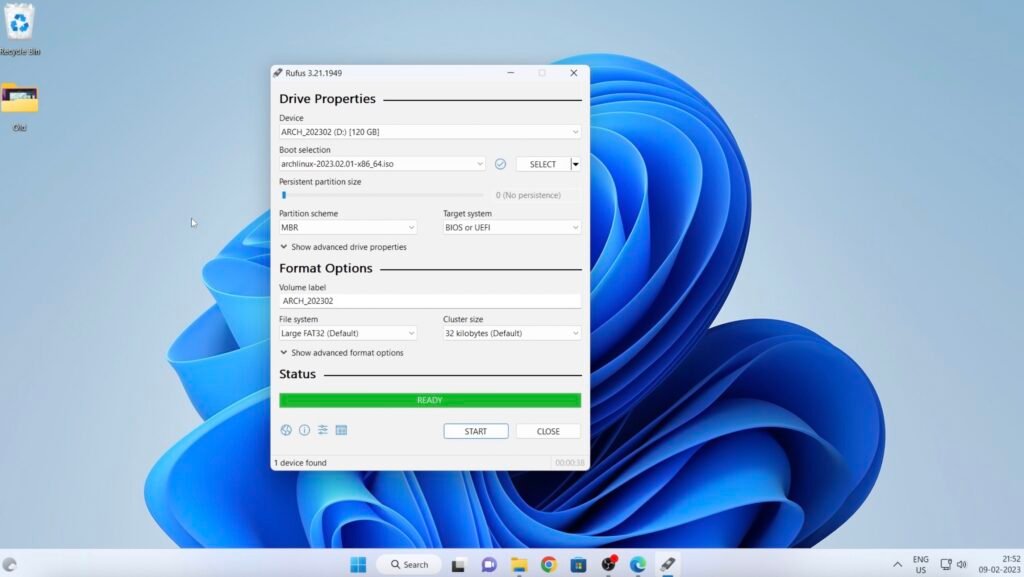
Once the flashing process is complete, restart your PC or laptop into the boot menu (use ESC, F8, F9, F10, F12) and look for your USB drive.
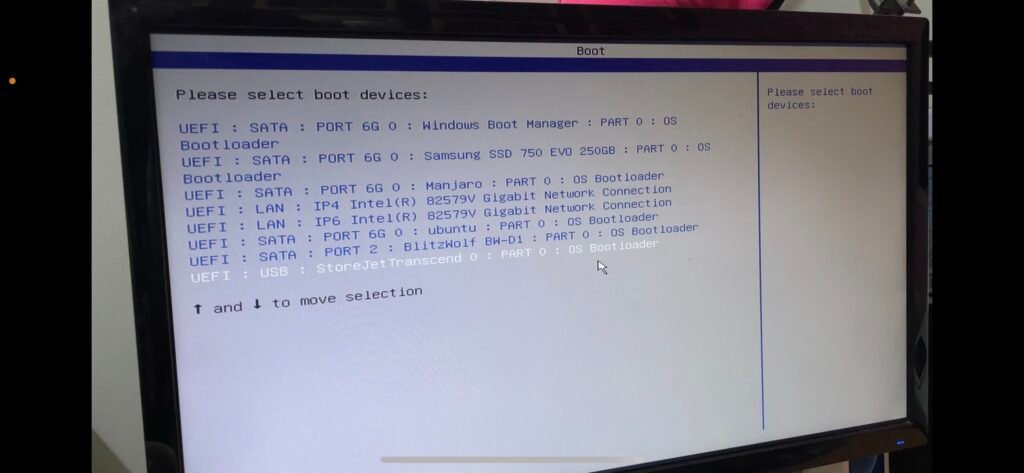
Select the bootable drive and choose to boot from the installation media.
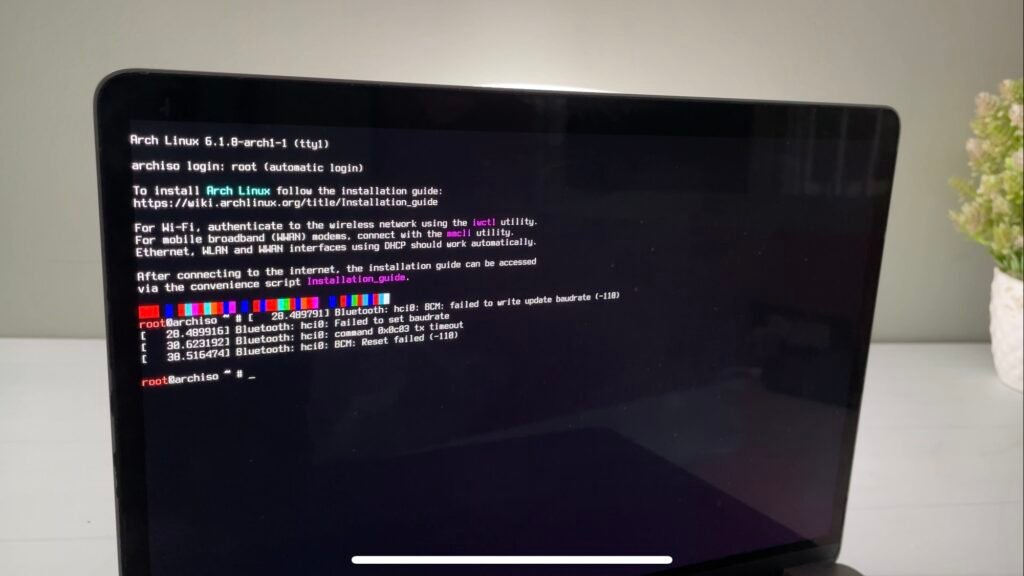
Now you can see it has successfully booted into the arch linux installation setup.
Installing ArchLinux
The first thing is to check, you have a stable internet connection. If your computer is connected to the internet via Ethernet, you can use the ping command to check the connection.
Connecting to WIFI
If your computer has built-in WiFi support, you can use the iwctl tool to connect to the internet.
To use iwctl, simply type iwctl in the terminal to enter the iwd shell. Then, type below command to see a list of network interfaces.
device listLook for wlan0 and then run the below command to see more information about the wlan0 interface.
device wlan0 show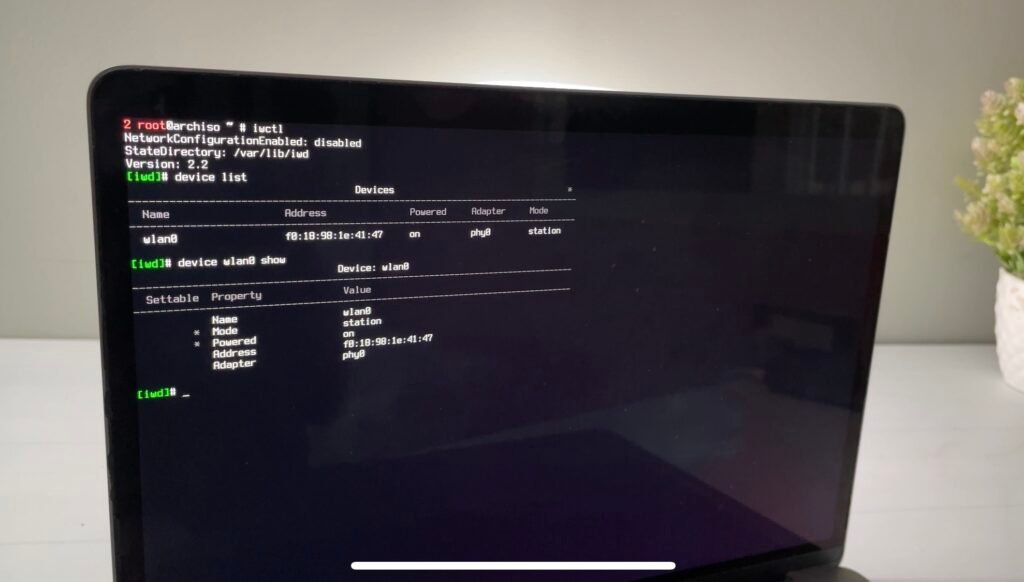
Next, run the below command to connect to wireless lan.
station wlan0 connect WIFI_NAMEeg: station wlan0 connect AppleSiliconThen press the return key and enter the wifi password. After entering the password, wait for 5 seconds and press the enter key to connect to the internet. You may not see any output, but if the connection was successful, you can simply exit the iwd mode.
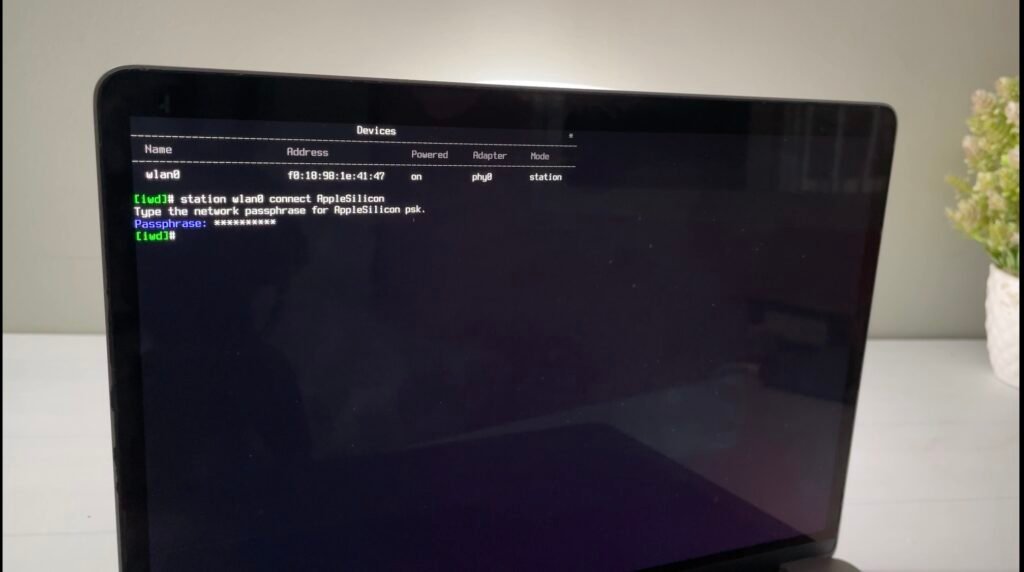
That’s it, you have successfully connected to the internet and you are ready to continue with the Arch Linux installation process!
Now, run the ping command and make sure you are receiving the packets.
Then run the below command to synchronize the system packages and upgrade them to the latest version.
pacman -SyFormat the Drive
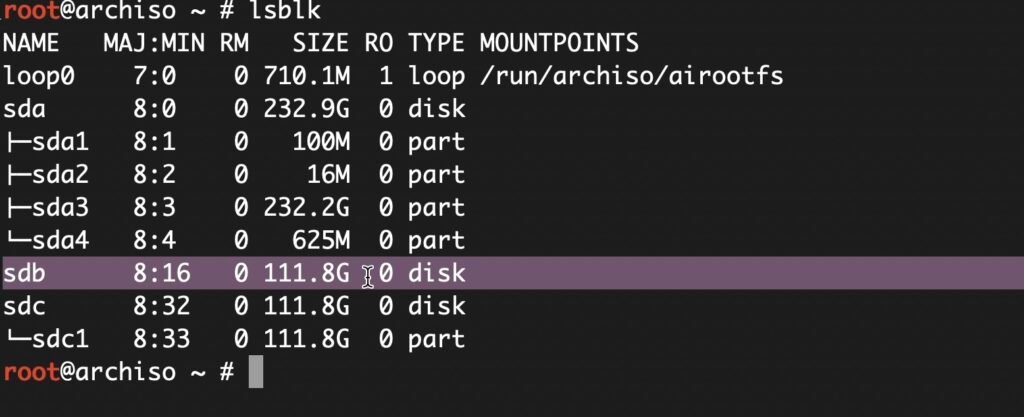
It’s time to format the drive and prepare it for the Arch Linux installation. Type lsblk in the terminal to view a list of all connected drives. In my case, /dev/sdb is the drive where I want to install Arch Linux.

You can also use the fdisk -l command to see more information about the drives.
It is important to be careful and make sure that you are formatting the correct drive. Once you have confirmed the correct drive, run the below command to launch the gdisk.
gdisk /dev/sdbReplace the sdb with the appropriate one. In the gdisk tool, press x to enter the expert mode, and then press z to erase the drive. Follow the prompts to complete the drive-erasing process.
At this point, the drive /dev/sdb should be brand new and free of any partitions.
Run ArchInstall Script
Now, launch the Arch Linux installer script, by typing the below command.
archinstallIf the command is not found, you can install the required package by running this command.
pacman -Sy archinstallThe ArchInstall script streamlines the Arch Linux installation process, making it faster and easier. Use the arrow keys to navigate through the options.
First, set the system language by selecting the appropriate option. The first five options can be left at their default values.
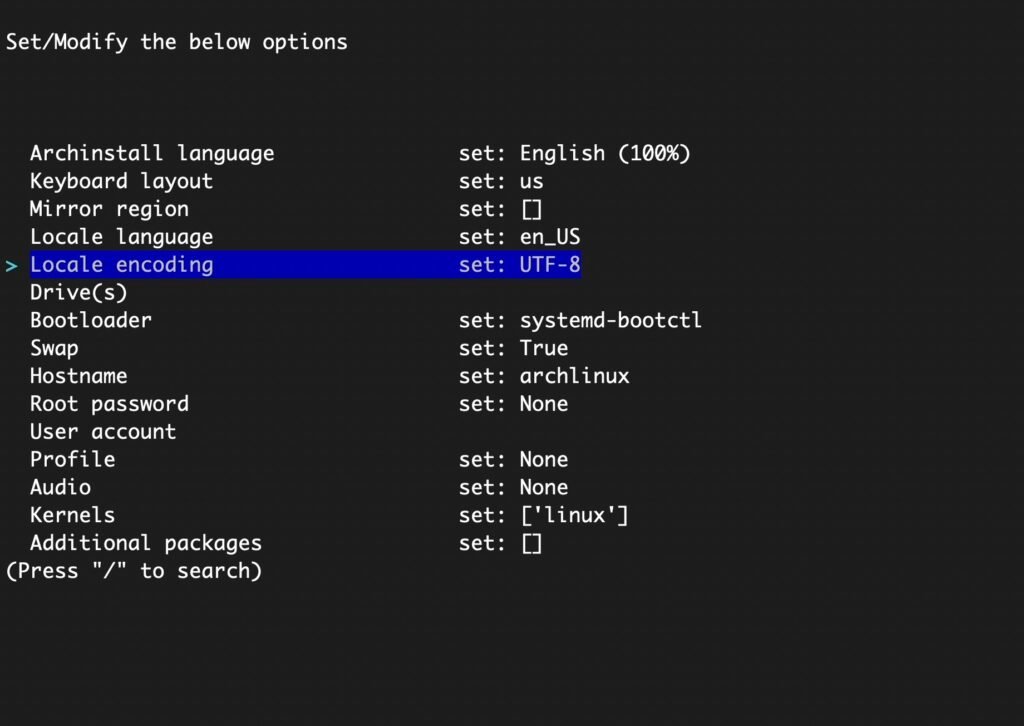
Next, highlight the drive that you want to install Arch Linux. In my case, it’s /dev/sdb. Select the drive by pressing either the space bar or the tab key. You will see an asterisk (*) between the square brackets to indicate that the drive has been selected.

Then, Press the enter key to return to the main menu.
Now, select the disk layout option and choose the second option to wipe the drive and use the default partition layout. You can choose Btrfs as the file system for the installation.

Additionally, if you want to secure your installation with encryption, you can set an encryption password.
Next, select the bootloader. You have the option to use either the Systemd or the GRUB bootloader. I am gonna choose grub.

I will leave the swap value set to true, and leave the hostname as “archlinux“. After that, set the root password to assign a password for the root user.
Then, create a new user account. You can even add the new user to the sudoers list for elevated privileges. Now scroll up and choose to confirm and exit.
It’s time to install the desktop environment. To do so, select the “Profile” option and choose “Desktop.” The ArchInstall script offers a plethora of options to choose from, but for this demonstration, I will opt for the Plasma desktop environment.
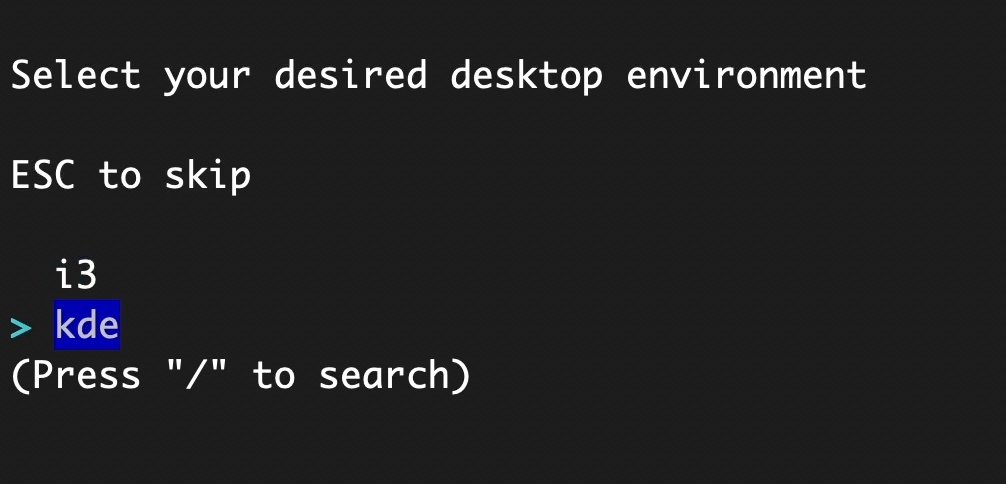
Next, select the graphic drivers that you want to install. If you have a dedicated Nvidia graphics card, choose the proprietary or nouveau driver accordingly.
Then, select the audio option and choose the audio server. For best results on most computers, it’s recommended to use PipeWire. If you wish, you can also install additional kernels, but for now, I will stick with the default or the latest available kernel.
Under the “Additional Packages” option, you can specify a list of tools to be installed, separated by spaces.

After that, select the network configuration and choose to use the network manager. Finally, select your time zone to set the correct time on your system.
Now go ahead and check all the options and haven’t left anything blank.
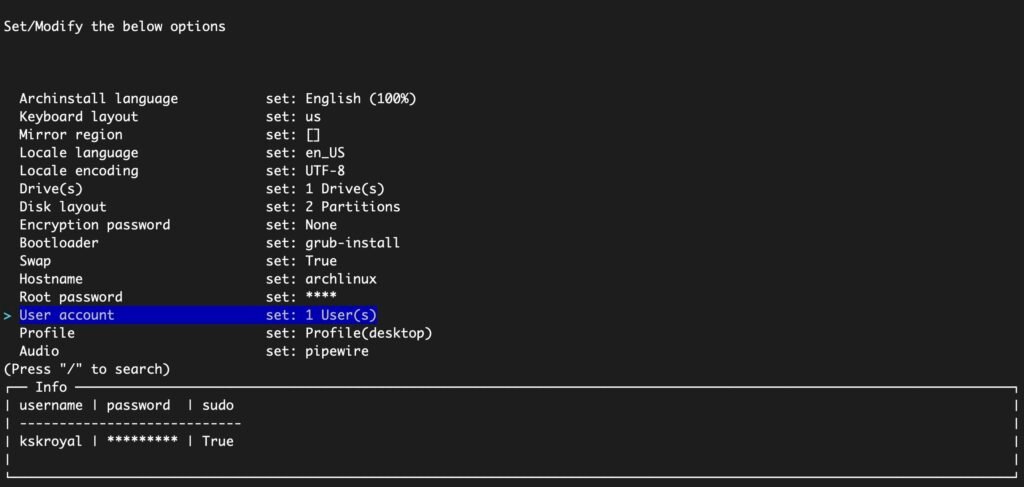
Once you’ve confirmed all the options, select the “Install” option and wait for a few minutes for Arch Linux to be fully installed on your computer.
That’s it, With a few simple steps, you’ve successfully installed Arch Linux using the ArchInstall script!
Post Installtion
The prompt to perform post-installation steps will appear once the installation has been completed. Select “Yes” to enter the chroot environment and start customizing your new Arch Linux installation.
Now it’s time to install useful tools, such as Firefox, LibreOffice, and bpytop. Once you’ve finished installing, exit the chroot environment and type reboot to restart your computer. The computer should automatically boot into Arch Linux, but in case it doesn’t, you can select the drive from the boot menu.
This is how you can quickly and easily install Arch Linux in just 5 minutes using the ArchInstall script. Let us know what you think in the comments section below.
