Install Kali Linux NetHunter On Any Android Device. This guide doesn’t require root or custom recovery. So, All You need is a stock unmodified android device to install Kali NetHunter without voiding the warranty. Let’s get started.
Pre-Requisites
- You need an android smartphone or tablet running Android 10 or higher.
- You need to reserve a 10GB of free space on the internal storage
Download Termux And NetHunter KEX
Installing Kali NetHunter Rootless edition on an android smartphone or tablet is only possible with an app called Termux. Open your Favourite browser, head over to the GitHub page using the below link, and download the Termux Application. Make sure you are downloading the file that says ARM64 V8.
https://github.com/termux/termux-app/releases
Then head over to the below link and download the net hunter store application.
https://store.nethunter.com/
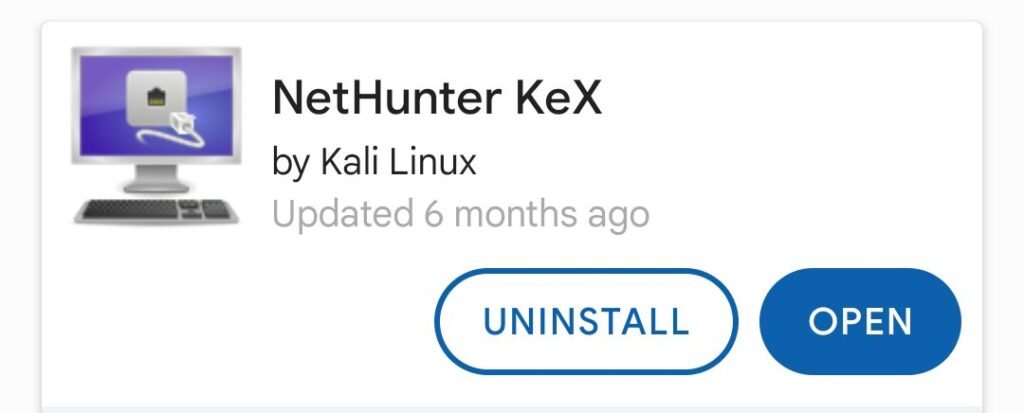
Once you have done Downloading both files go ahead and install them on your android device. Now, open the NetHunter store and search for another app called Nethunter Kex (See the screenshot below). Go ahead, download & Install the app.
Setup Kali NetHunter RootLess edition
Then, Open Termux, and wait for a few seconds to complete the setup. You can see a prompt that is ready to take input, we need to type a bunch of commands to set up Kali NetHunter. If you have a BlueTooth mouse or keyboard connect it to your Android device via a USB port. This helps you type the commands very easily.
Then type termux-setup-storage to access the file storage permission. Go ahead and choose to allow.
Then type pkg upgrade to update the package manager. You will see a few prompts asking for confirmation just type Y for all.
If in case pkg upgrade fails to run, you can run termux-change-repo and change your mirror for the Main repository to a different termux mirror. Once it’s done, rerun the command to upgrade.
It’s time to install the wget command. To do so, type pkg install wget Once it’s done, type
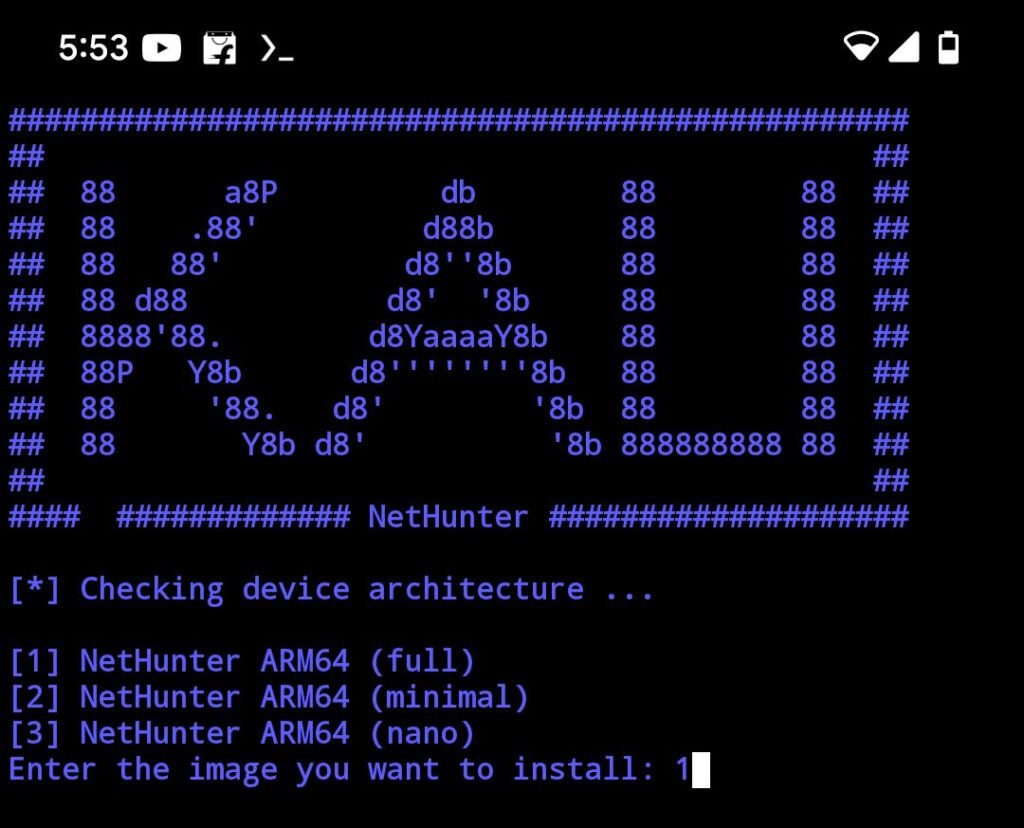
wget -O install-nethunter-termux https://offs.ec/2MceZWr ( Case-Sensitive ) and press the enter Key. This command downloads the installer script to the current working directory. To execute the script we need to change permissions. Type chmod +x install-nethunter-termux. Then run the script by executing ./install-nethunter-termux
After executing the script, you may be asked to choose the device architecture. I choose the first option.
This will take some time to set up Kali NetHunter, make sure your android smartphone is connected to the faster internet. It’s also recommended to increase the screen time limit to 30 minutes which prevents your device from going to sleep.
After sometime, it may ask to delete the root file system, choose N for no. That’s it, now we have done installing Kali Linux net hunter rootless edition running inside an android smartphone.
Update Kali
You can type nethunter to enter the CLI mode of Kali Linux. The first thing to do after entering into CLI Mode is to update the kali by running sudo apt update command. This is a kinda PRoot thing we are doing which is a user-space implementation of chroot. Once it’s done, you can install the command like neofetch by running sudo apt install neofetch. You can run commands like nmap, ping, and more.
Note: Some Commands require a rooted device to work correctly.
Connecting To Desktop (GUI)
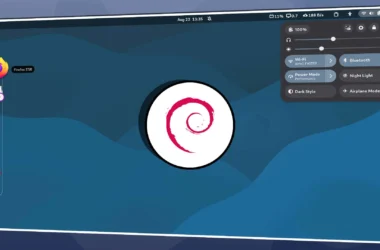
It’s time to enable the desktop mode of the Kali Linux NetHunter edition. To do so, type exit to quit CLI mode. Then type nethunter kex passwd and press the enter key. Now set a password. Choose No for view-only password. Then, type nethunter kex & to start running the VNC server.
Now open, the NetHunter Kex application, input the VNC password, and press the connect from the top right. Voila, now you can see, the full desktop mode of Kali Linux.
I tried running the Firefox browser and it keeps on showing an error whenever I try to run a website. The terminal and a few other tools of Kali NetHunter worked very well.
Fix Signal 9 Error
Keep in mind, After using the GUI for a few minutes VNC server may get killed and you will see signal 9 error message on termux. This is because of the Phantom process killer introduced in android 12 or higher. It’s a background process limiter that kills the app processes using excessive CPU or system resources. TERMUX is a well-known app suffering from this background limitation.
Anyway, to fix this issue, On your android device head over to the about page and tap on the build number 7 times to activate the developer options. Then enable android debugging from developer settings. Then, connect your android device to the computer. In my case, I am connecting to a windows 11 computer. If you see any popups on your device, go ahead and allow the permission. Make sure you have installed ADB & Fastboot Commands.
Download ADB & Fastboot: https://developer.android.com/studio/releases/platform-tools
Now open a command prompt, and type adb devices. You will see the device identifier. This means the computer can interact with Android devices using the ADB shell.
Now go ahead and execute the below commands, one after the other.
adb shell "/system/bin/device_config set_sync_disabled_for_tests persistent”
adb shell "/system/bin/device_config put activity_manager max_phantom_processes 2147483647”
adb shell settings put global settings_enable_monitor_phantom_procs false
These commands will disable the phantom process killer. To verify you need to run below two commands one by one.
adb shell "/system/bin/dumpsys activity settings | grep max_phantom_processes”
adb shell "/system/bin/device_config get activity_manager max_phantom_processes”
Make sure after running these two commands the return value should be 2147483647. That means the phantom process killer is successfully disabled.
Now, Quit & open Termux. The type nethunter kex & to start the VNC server once again. Voila, you no more face any issues.
Note: It’s also recommended to disable the battery restriction on termux so it stays active in the background. This is how you fix signal 9 errors in android 12 or 13 using ADB.