If you’ve just installed Linux Mint 22 and don’t know what to do next, this guide will show you the key steps to get your system running smoothly and make it more enjoyable to use.
Whether you’re new to Linux Mint or already experienced, these 22 important actions will help you get the best out of your new setup.
1. Update Your System
Updating your system is the first step after installing Linux Mint. Open the terminal and execute the following command to retrieve the latest package information and upgrade all your packages:
sudo apt update && sudo apt upgrade2. Check and Install Drivers
Linux Mint includes the Driver Manager, a tool that detects hardware components such as graphic cards, printers, and Wi-Fi adapters, and recommends suitable drivers. For example, if you have an NVIDIA GPU, it will suggest installing the recommended drivers. After installation, restart your computer.
3. Manage Startup Apps
Managing startup applications is crucial for optimizing boot times. To manage startup apps:
- Search for “Startup Applications” in the menu and open it.
- Review the list of programs that start automatically and:
- Turn off unnecessary programs.
- Remove apps you don’t need to start automatically.
This helps your computer start faster and run more efficiently.
4. Take Snapshots with Timeshift
Timeshift is a built-in backup tool in Linux Mint. It’s highly recommended to create a snapshot of your system’s current state. This allows you to restore your system to a previous state if needed, avoiding the need to reinstall the operating system.
5. Use Fractional and Text Scaling
High-resolution screens may make UI elements appear too small. To adjust scaling in Linux Mint:
- Open System Settings.
- Go to Display, then the Settings tab, and enable Fractional scaling controls (experimental).
- In the Layout tab, choose a scaling option like 125%, 150%, or 175% to suit your preference.
You can also adjust the font scaling factor for better text visibility.
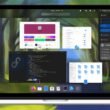
6. Customize Panels, Add Applets, and Themes
Customize your panels in Linux Mint by:
- Going to Settings and selecting Panel to adjust visibility, height, and other properties.
- Adding widgets or applets via the Applets section. For example, you can add a workspace switcher.
- Rearranging applets by right-clicking on the panel and enabling Panel Mode.
Additionally, use the Themes section to apply light or dark themes and adjust accent colors.
7. Use Hotcorners
The Hotcorners feature in the Cinnamon desktop allows you to assign actions to the four corners of your screen. To configure Hotcorners:
- Go to Settings and select Hotcorners.
- Choose a corner and assign an action, such as “Show all windows.”
This feature enhances workflow efficiency by providing quick access to various functions.
8. Replace APT with NALA
The default APT package manager can be slow. Consider replacing it with NALA for faster downloads and improved features:
- Install NALA using the command:
sudo apt install nalaThen Run sudo nala fetch to filter the fastest mirrors and add the top 10 to the source list for improved download speeds.
9. Install OBS Screen Recorder
OBS Studio is a free, open-source screen recording tool ideal for capturing gameplay, presentations, and more. Install it using the following command:
sudo apt install obs-studio10. Install Multimedia Codecs
To play MP4 videos and other media file formats, you might need to install multimedia codecs. If you skipped this during installation, open the Software Manager, search for “codecs,” and install them.
11. Improve RAM Usage
Adjust the “swappiness” value to optimize RAM usage. When your computer’s RAM usage hits a certain point, it starts using a swap space to manage additional memory. Swap space is slower than RAM and should be used sparingly.
By default, the system starts using swap when 60% of RAM is used. If you have only 4 GB or 8GB of RAM, this might be too soon. I recommend lowering the threshold to 10, so swap is used only when 90% of RAM is in use. You can adjust this setting by changing the “swappiness” value in the sysctl.conf file.
- Edit the sysctl.conf file:
- sudo nano /etc/sysctl.conf
- Add the line
vm.swappiness=10at the end of the file, save changes, and restart your PC.
This setting helps keep your system more responsive under heavy workloads.
12. Improve Battery Life
To enhance battery performance, use TLP:
- Install TLP with the command:
- sudo apt install tlp
- Start the TLP daemon service:
- sudo tlp start
Alternatively, you can use AutoCPUfreq for better battery life and performance optimization.
13.Setup Auto-CPUFREQ
“Some users, on specific hardware, may notice a higher battery consumption rate on Ubuntu Linux than on Windows, especially on laptops. To address this issue, the easiest way is to solve this problem on Ubuntu by installing Auto-CPUFREQ.
This is a very useful tool that actively monitors the battery state, CPU usage, and temperatures, and improves battery life without making any compromises.
To set up autocpufreq, copy and paste the below line of code into the terminal.
git clone https://github.com/AdnanHodzic/auto-cpufreq.git
cd auto-cpufreq && sudo ./auto-cpufreq-installer
Once it’s done, go to the app drawer and open the GUI tool. Now, activate it to run as a daemon service by clicking on the install button.
It uses a default Profile to optimize the performance and battery life. If you want peak performance you can enable Performance mode. If you don’t want High performance enable power save for longer battery life.
14. Install Your Favorite Web Browser
While Linux Mint comes with Mozilla Firefox pre-installed, you may prefer other browsers like Google Chrome. Download the .deb file from the official website and install it, or opt for the open-source Chromium browser.
15. Install Essential Packages
Installing essential packages can enhance your Ubuntu Linux experience. Run the following command to install Linux headers and additional useful packages:
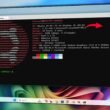
sudo nala install htop neofetch bpytop clang cargo libc6-i386 libc6-x32 libu2f-udev samba-common-bin exfat-fuse default-jdk curl wget unrar linux-headers-$(uname -r) linux-headers-generic git gstreamer1.0-vaapi unzip ntfs-3g p7zip htop neofetch bpytop git gcc make curl bzip2 tar16. Must Install Apps
Enhance productivity by installing essential GUI applications like VLC, Transmission, Obsidian, and Spotify. Use Flatpak or NALA for easy installation.
sudo nala install vlcflatpak install flathub com.spotify.Clientflatpak install flathub com.transmissionbt.Transmissionhttps://flathub.org/apps/net.nokyan.Resources17. Run Local LLMS Like ChatGPT
In the world of generative AI tools, you can install and run chat GPT like LLMS offline on Ubuntu using Ollama. It is a free and open-source tool that helps run large language models locally. You can Run LLAMA3, Mistral, Tiny LLaMA, and other models on Ubuntu.
First install a CURL package by running the below command:
sudo nala install curlThen copy the below code paste it inside the terminal, and run the script. This will set up OLLAMA in a few minutes.
curl -fsSL https://ollama.com/install.sh | shIt may detect for NVIDIA GPU on your computer and uses it to generate faster output. Now, let’s try installing LLAMA3 by running the below command.
ollama run llama3Congratulations, now you can ask anything to the model like ChatGPT to find the answers and works without the internet.
For More Models See this link
18. Setup Steam To Play Windows Games
Installing Steam on Ubuntu can be a great addition for gamers who want to play a wide range of Windows games using Proton. Go a head and run the command to setup steam.
sudo nala install steamThen, type steam and press enter to setup runtime environment. Once it’s done setting up the steam environment log in with your Steam account.
Then enable proton translation layer to play windows games. Click on Steam, from the top left and choose settings.
Then select compatibility, enable Steam Play for all other titles and restart the Steam. Now again go to the compatibility settings, where you set proton to run other titles.
It uses Proton Experimental by default, and you do not have to change that in many cases.
Once you are done with the compatibility settings, all you need to do is download the game as usual and launch it from Steam.
19. Run Windows Apps
If you have switched to Ubuntu from Windows, and looking for a way to run some Windows apps, you can use bottles. Bottles introduce a new way to handle Windows binaries using runner environments. You can choose between a Gaming and Software environment based on the type of software you want to start.
I have run specific Windows apps like IDM and NotePad++. Keep in mind, that you should not expect to run every Windows app, it’s just an experimental build and works with very few Windows apps. Setup Bottles With Flatpak:
flatpak install flathub com.usebottles.bottles20. Setup QEMU / KVM To create Virtual machines
Running Virtual machines in Ubuntu is very easy. If your system supports high-end hardware, it’s recommended to set up QEMU KVM which allows to creation of virtual machines.
Go ahead and install QEMU / KVM and Virt-Manager by running the below command.
sudo apt install qemu-kvm qemu-utils libvirt-daemon-system libvirt-clients bridge-utils virt-manager ovmfOnce it’s done, open Virt-Manager & grab any operating system image, and start running it inside a virtual machine.
21. Use Stacer
Stacer is an open-source system optimizer and application monitor that helps users manage the entire system with different aspects. Stacer is an all-in-one system utility that allows you to manage system resources, software management, disk monitoring, daemon services, startup applications, and more.
Stacer also supports System Cleaner, which helps remove unnecessary log or cache files and empty the trash on your system. To install stacer run the below command:
sudo nala install stacer22. Enable Snap (If Required)
To use Snap packages, enable Snap support:
- Remove the no-snap preference:
sudo rm /etc/apt/preferences.d/nosnap.pref- Update package lists and install Snapd:
sudo apt update && sudo apt install snapd
These 22 steps will help you set up and optimize your Linux Mint 22 system, ensuring a smoother and more efficient user experience. If you found this guide helpful, please give it a thumbs up and share your thoughts in the comments below! Check the video below for more information